Author Archives: Dustin Nichols

shear maintenance

Prolong the Lifespan of Your Shears: A Salon’s Guide to Shear Maintenance

As a hairstylist, your shears are not just an essential tool; they are an extension of your artistic prowess, a conduit that helps turn your creativity into stunning haircuts. But are you doing enough to protect these precious tools of trade? The longevity and effectiveness of your shears substantially depend on the way you handle, use, and maintain them. Extending the lifespan of your shears is not just about saving money; it’s about preserving the tool that helps you deliver impeccable services, maintaining your professional reputation, and ensuring customer satisfaction. Thus, we bring you a comprehensive salon’s guide to shear maintenance, revealing how you can add years to the life of your shears while retaining their prime functionality. So, dive in and unlock the secrets to longer-lasting, sharper shears.

The Importance of Maintaining Your Salon Shears

As a professional hairstylist, your salon shears are your most essential tools. They determine the precision of your work and reflect the quality of your service. Therefore, this important asset deserves your thorough care and attention.

Firstly, well-maintained shears increase efficiency and enhance your performance. They enable you to cut hair smoothly, resulting in clean, precise cuts every time. Secondly, the lifespan of well-cared-for tools is significantly prolonged, reducing the need for frequent purchases of new equipment and saving you a considerable amount of money in the long run. Lastly, proper shear maintenance also contributes to your working comfort, preventing occupational disorders such as carpal tunnel syndrome caused by using blunt or poorly cared for shears.

 In-Depth Understanding of Salon Shears

Professionals need to understand their tools, and shears are not an exception to this rule. Salon shears are not the same as regular scissors. They are expertly crafted haircutting tools designed to cut hair with precision. Their sharpness allows them to provide neat, precise cuts, essential for achieving the desired hairstyle for any client.

Normally, they are made from high-quality metals that are resistant to rust and can stay sharp for longer. Investing in a high-quality shear means you are investing in longevity and great results for your clients. However, they still need to be looked after correctly to maintain their quality and precision.

 Regular Shear Maintenance

Just as you take care of your hair by washing and conditioning it regularly, your salon shear also needs regular maintenance to preserve its performance. This routine includes cleaning, drying, oiling, and careful storing. Failing to adhere to these steps can lead to the accumulation of dirt, hair residues, and product build-up that may dull your shears.

Moreover, moisture from water and chemicals can cause rust and corrosion to your salon equipment, which can significantly reduce their lifespan. Therefore, you must wash, dry, oil, and store your shears properly after every use to ensure their longevity.

Regular Shear Sharpening

Sharpening your shears is one of the most effective ways to prolong their lifespan. A sharp shear does not only provide precise cuts, but it also greatly eases the strain on your hand. When a shear becomes dull, hairstylists typically apply more pressure when cutting, which can lead to hand fatigue and even chronic pain over time.

Regular shear sharpening helps to maintain the blade’s sharpness, ensuring efficient cuts and comfortable use. While you can learn to sharpen your shears yourself, hiring a professional service might be a worthwhile investment to ensure your tools are sharpened correctly and safely without any damage.

Salon Tool Maintenance

Just like looking after your shears, your other salon tools also need care to ensure they last and perform well for years to come. Regular cleaning, correct storage, and occasional servicing are essential parts of salon tool maintenance, which contributes to your overall professional image as a salon owner or hairstylist.

Whether it’s hair dryers, combs, or hair straighteners, each of these tools need their own care and attention. Regular cleaning and storage in a cool, dry place to avoid moisture and excessive heat can go a long way in prolonging the lifespan of these tools.

Hair Shear Cleaning Tips

Cleaning your shears is vital in maintaining their performance and lifespan. The process is quite simple: after each use, wipe off any residue with a clean dry cloth. You can also use a disinfectant spray specially formulated for salon tools to kill any bacteria or germs.

It’s equally important to ensure your shears are dry before storing them. Moisture can lead to rusting and corrosion, both of which can significantly diminish their performance.

Shear Lubrication Tips

Lubricating your shears adds to their smooth operation and prevents the blades from wearing out quickly. It’s recommended to lubricate your shears at least once a week or more often under heavy use.

To lubricate, just drop a bit of shear oil in the pivot area while the shears are open, and then open and close them several times to spread the oil. This ensures that the shears operate smoothly and ensures their longevity.

Conclusion

Maintaining your salon shears can seem like an added stress, but with these tips, it can be a simple part of your routine. With regular cleaning, sharpening, lubricating, and proper storage, you can significantly prolong the lifespan of your shears and ensure they perform at their best.

Remember, your shears aren’t just tools – they’re an extension of your skills and services. Treat them with the care they deserve, and they’ll help you continue to provide excellent service to your clients for many years to come.

how to properly care for your high end hair cutting shears

The Ultimate Guide to Salon Shear Maintenance: How to Keep Your High-End Tools Sharp and Long-lasting

Setting the Stage for Salon Excellence: Why High-End Shears Matter

Let’s face it: a salon simply cannot function without shears. Picture a painter without a paintbrush – it just doesn’t work. High-quality salon shears not only provide an impeccable cut, they also ensure the stylist’s reputation. Keep reading to learn how to maintain and preserve your high-end shears, so you can be confident in every snip.

The difference between high-end shears and other scissors is extraordinary. Crafted with premium materials and engineering, high-end salon shears provide unparalleled precision in every cut. But what good is a top-of-the-line shear if it’s not properly maintained? That’s where this guide comes in!

Cutting Through the Jargon: Understanding Types of Steel and Their Importance

Salon shears are made from a variety of different steels, and each type offers its own benefits and characteristics. Stainless steel shears tend to be the most popular choice for professionals due to their longevity and resistance to rust. However, there are also Damascus steel and Japanese steel shears that are highly regarded for their performance.

Knowing the type of steel your shears are made from is essential when it comes to maintenance and sharpening. Different metals require specific treatment to maintain their sharpness and overall health. Keep reading to find out how to properly care for your shears based on their material.

Feeling Sheepish About Maintenance? Start With the Basics

Salon shear maintenance is extremely important in preserving the life and quality of your tools. The first thing to keep in mind is proper cleaning. After each use, wipe your shears down with a clean, dry towel. This prevents hair and chemicals from building up on your shears, which can dull the blades and hinder their performance.

In addition to cleaning, lubricating your shears is crucial. Oil the pivot area (where the two blades meet) regularly, ideally after each use, to keep your shears functioning smoothly. A drop or two of shear oil should be applied and worked into the pivot area by opening and closing the shears. This will reduce friction and extend the life of your shears.

Don’t Get Bent out of Shape: Properly Aligning Your Salon Shears

Proper alignment is a key component of shear maintenance. It ensures that your shears perform consistently and effectively. To check the alignment of your shears, hold them up and look at the tips of the blades – they should meet perfectly. If they don’t, it’s time to adjust.

Aligning your shears can be a delicate process that involves loosening the tension screw and realigning the blades by gently bending them back into place. If you’re unsure about this process, consult the manufacturer or your shear supplier for guidance or professional assistance.

Sharp as a Tack: Regularly Honing Your Salon Shears

Blade sharpness is a top priority for salon shears. A dull shear leads to a less precise cut and can even damage the client’s hair. Regular sharpening helps maintain optimal performance and prolongs the life of your shears.

While honing your shears may seem intimidating, it’s easier than you may think! Look for a qualified professional in your area who specializes in sharpening salon shears. Make sure to sharpen your shears every 500-700 haircuts or as soon as you notice a decline in performance.

A Firm Grip: The Importance of Tension Adjustment

Shear tension is a crucial aspect of maintenance that is often overlooked. Proper tension allows the shears to cut smoothly and evenly. To check the tension, simply hold the shear with one blade facing the floor and the other pointing up. Open the blades about halfway and let go of the top blade. If it gently closes, your tension is correct. If it falls quickly, the tension is too loose, and if it stays in place, the tension is too tight.

Adjusting shear tension should always adhere to the manufacturer’s guidelines and may require specialized tools, such as a tension key. Remember to check and adjust the tension regularly to ensure the best performance.

Safe and Sound: Storing Your Salon Shears the Right Way

When it comes to storing your salon shears, protection is key. Storing your shears properly will prevent damage and preserve their quality. Invest in a shear case to keep them safe when not in use. Avoid placing shears in a drawer or leaving them unprotected in your workspace.

Not only will a shear case protect your tools from accidental damage, but it will also keep them clean and well-organized. With a designated spot for each shear, you can easily keep track of your tools and keep them in tip-top shape.

Setbacks Happen: Repairing Your High-End Salon Shears

With proper maintenance, accidents and damage are less likely to occur, but mishaps are bound to happen eventually. If your shears become damaged, don’t panic. Look into your shear’s warranty and consult with the manufacturer or supplier. Many companies provide repair services for their products to ensure that your high-end salon shears stay in excellent condition.

Get Your Shear Game Strong: A Review of Maintenance Tips

High-end salon shears are a valuable investment, and taking proper care of them will preserve their quality and extend their lifespan. Remember the key maintenance tips: clean and lubricate regularly, align and sharpen the blades, adjust tension, store them safely, and seek professional help when repairs are needed.

Salon shear maintenance is essential for a successful styling career. By following these tips, you ensure that your shears stay sharp, effective, and long-lasting – providing you with the confidence and tools needed to be a cut above the rest.

4 piece hair cutting kit

Get Salon-Worthy Results at Home with Our Affordable 4-Piece hair Cutting Kit

Are you tired of paying a fortune at the salon for the perfect haircut and style? Are you ready to take matters into your own hands and start cutting and styling your hair at home? If so, you’ll need the proper tools to ensure salon-worthy results. Gone are the days when cutting your hair at home meant a cringe-worthy, uneven hack job. With our affordable 4-piece shear kit, achieving that professional look in the comfort of your own home is possible!

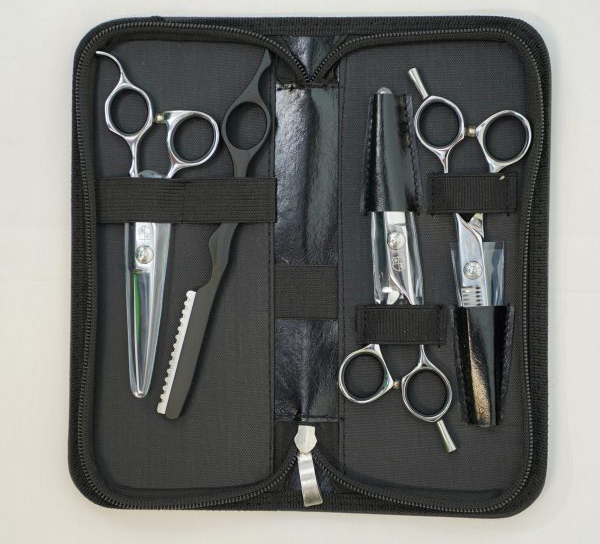
This comprehensive hair cutting kit includes everything you need to give yourself or a loved one the perfect haircut: a 5.75-inch cutting shear, a 32T thinning shear, a 5.5-inch cutting shear, and a hand/feather razor. The set also comes with a convenient shear wallet for storage and easy transport to ensure that your styling tools stay safe and secure.

In this article, we’ll explore the benefits of each tool in the kit and provide helpful tips and tricks for using them to achieve salon-worthy results at home. Grab your shears and let’s get started!

The 5.75-Inch Cutting Shear – Your Go-To Tool for Precise Cuts

The 5.75-inch cutting shear is the star of our 4-piece shear kit. It’s the perfect size for most hair types and is versatile enough to create various hairstyles from classic bobs to long, flowing locks.

Why is the 5.75-inch cutting shear so great? It’s all about precision! This shear has a slim, ergonomic design that makes it easy to handle and maneuver while cutting. The sharp blades ensure clean, even cuts every time, making snipping away unwanted length or adding face-framing layers a breeze.

Tips for using the 5.75-inch cutting shear:
1. Always start with clean, dry hair.
2. Hold the shear at a slight angle to avoid blunt, straight-across cuts.
3. Take small sections of hair at a time and don’t rush.

Click here to order

The 32T Thinning Shear – Tame Unruly Hair

Thinning shears are an essential tool for anyone with thick, unruly hair. They’re designed to remove bulk without sacrificing length, making them perfect for managing heavy, hard-to-style locks. The 32T thinning shear in our kit features 32 teeth with evenly spaced gaps, providing optimal thinning without creating noticeable gaps in the hair.

Tips for using the 32T thinning shear:
1. Be selective in where you use it – focus on areas with excess bulk.
2. Use a comb to guide your sections and ensure an even distribution of hair between the teeth.
3. Hold the thinning shears parallel to the hair shaft rather than cutting straight across.

Click here to order

The 5.5-Inch Cutting Shear – Perfect for Detail Work

While the 5.75-inch cutting shear is a versatile workhorse, the 5.5-inch cutting shear in our kit is perfect for detail work, like trimming bangs or shaping around the ears. Its smaller size allows for greater control, ensuring you get the exact look you want.

Tips for using the 5.5-inch cutting shear:
1. Use the tip of the shears for precision snips – this is especially important when trimming bangs.
2. Comb hair into its natural fall before cutting to avoid uneven results.
3. Always cut less than you think you need – you can always trim more if necessary.

Click here to order

The Hand/Feather Razor – Soften and Blend

The hand/feather razor in our 4-piece shear kit is an excellent tool for adding texture and blending layers. Its design allows for feathering effects that create soft, natural-looking hairstyles that blend seamlessly.

Tips for using the hand/feather razor:
1. Use a light touch – there’s no need for heavy pressure.
2. Angle the razor slightly away from the hair to achieve a feathered effect.
3. Be mindful of the direction you’re cutting – cutting in the direction of hair growth will yield a softer look.

Click here to order

The Shear Wallet – Convenient Storage and Traveling

Having a secure place to store your shears is essential for prolonging their lifespan and ensuring that they perform at their best. Our kit includes a stylish, durable shear wallet that keeps all your tools organized and protected during storage and transport.

Conclusion

Achieving salon-worthy results at home is possible with the right tools and techniques. Our affordable 4-piece shear kit provides everything you need, from the versatile 5.75-inch cutting shear to the essential hand/feather razor. With careful practice and patience, you’ll soon be on your way to fabulous, professional-grade hairstyles right in the comfort of your own home. So why wait? Get your shear kit today and start snipping your way to beautiful hair that rivals even the best salon styles!

Click here to order

thinning shears

Precision Cutting 101: Mastering the Art of Texturizing with Thinning Shears

Ever since the dawn of the cosmetology industry, artists have strived to perfect their skills in hair cutting and styling. Among the various tools and techniques used, thinning shears have proved to be essential for achieving that perfect blend of style, volume, and texture. While often overlooked by beginners, thinning shears are a game-changer in the world of hairstyling and texturizing.

In this in-depth guide, we’ll break down everything you need to know about thinning shears and how to master the art of texturizing with these must-have hair-cutting shears. So, settle down, grab a cup of coffee, and let’s begin our journey toward precision-cutting perfection.


What are Thinning Shears?

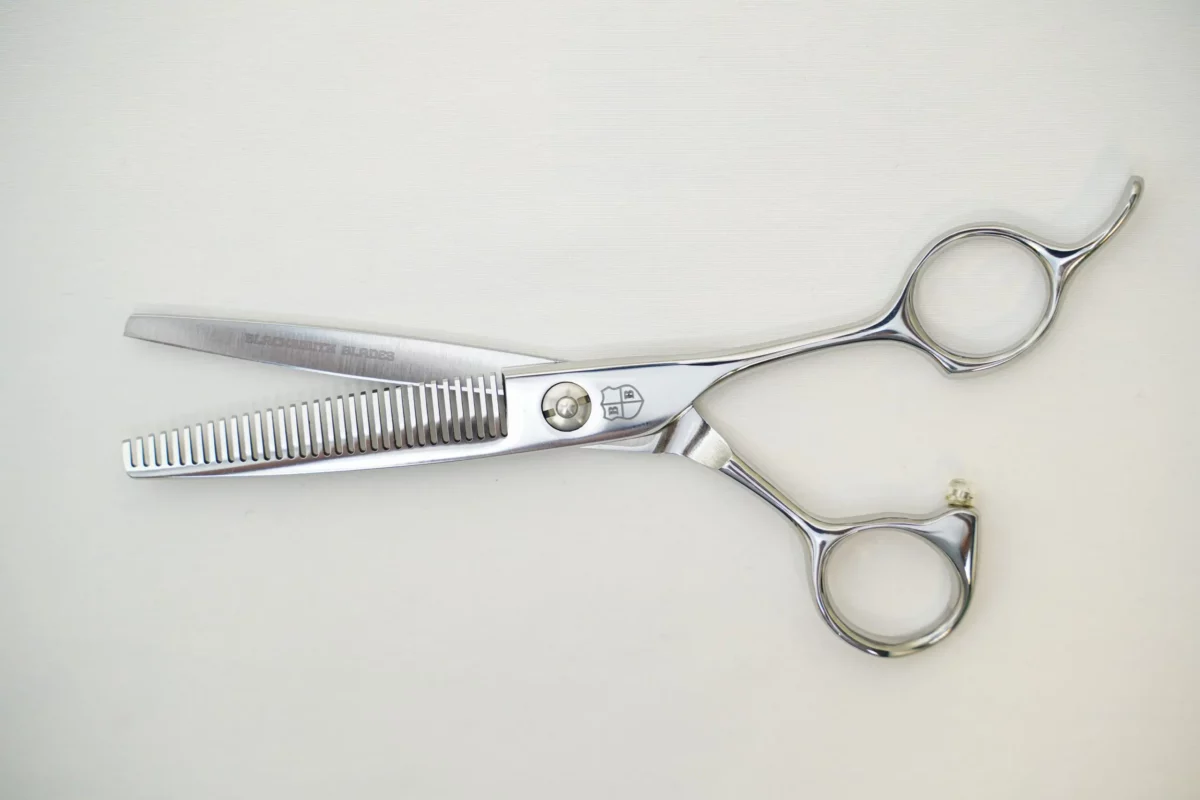
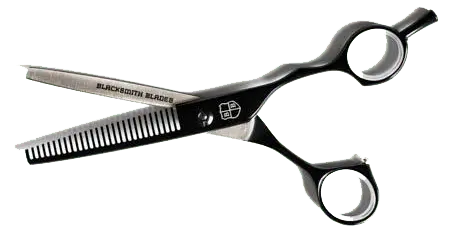
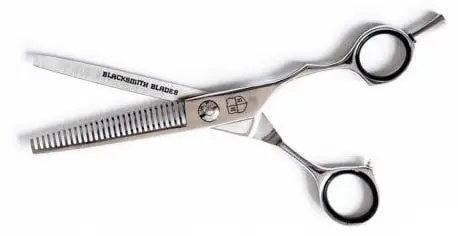
Thinning shears, also known as texturizing shears or blending shears, are a type of hair-cutting shears specifically designed to remove bulk and weight from hair without altering its length. Unlike regular scissors, thinning shears have one or both blades featuring a set of teeth, similar to a comb. These teeth help in cutting only a portion of the hair strands with each snip, allowing for a more subtle and controlled removal of hair.

The beauty of thinning shears lies in their versatility and unique ability to create texture within the hair. When used correctly, they can be the secret weapon for transforming a dull, lifeless haircut into a dynamic, voluminous masterpiece.

black thinning shears


Why Use Thinning Shears?

First and foremost, thinning shears are used to reduce bulk and weight from the hair without compromising on length. This feature is particularly beneficial for clients with thick, heavy, or unmanageable hair, as it helps in creating a more balanced and lightweight style. In addition, thinning shears can be used to create movement and dimension within the hair. By strategically removing some hair strands, you can create an illusion of depth and texture.

Moreover, thinning shears can be utilized to blend different layers in a haircut seamlessly. This is especially useful when dealing with choppy, uneven layers that need to be softened and blended together. In short, thinning shears are a versatile and indispensable tool for any stylist looking to elevate their skills in the realm of precision cutting and texturizing.


Types of Thinning Shears

Not all thinning shears are created equal; they come in various designs, sizes, and tooth counts to cater to different hair types, textures, and desired outcomes. Generally, thinning shears can be classified into three main categories:

1. Single-Sided Thinning Shears
2. Double-Sided Thinning Shears
3. Wide-Tooth Thinning Shears

Single-sided thinning shears have one smooth blade and one toothed blade, making them ideal for controlled precision cutting. With these shears, you can snip away at the hair with ease and confidence. On the other hand, double-sided thinning shears feature teeth on both blades. These shears are perfect for heavy-duty thinning and blending work, as they remove more hair strands with each cut.

Wide-tooth thinning shears, as the name suggests, have fewer teeth spaced further apart on their blades. These shears are best suited for creating bold, chunky textures and removing significant amounts of hair in one go. As a stylist, it’s crucial to familiarize yourself with the different types of thinning shears and choose the one that best suits your needs and the needs of your clients.


How to Choose the Right Thinning Shears

With so many options out there, choosing the right thinning shears can be a daunting task. However, by keeping a few crucial factors in mind, you can streamline the selection process. Start by considering the number of teeth on the shears – fewer teeth result in more hair being removed, while more teeth lead to a subtler effect. Also, pay attention to the size and design of the shears. Smaller, lightweight shears allow for greater precision and control, while larger ones facilitate quicker, more efficient thinning and texturizing.

Another essential factor is the quality of the materials used in the shears. High-quality stainless steel, titanium, or a combination of both ensures durability, sharpness, and corrosion resistance. Lastly, don’t forget to consider the comfort and ergonomic design of the handles. After all, you’ll be using these shears for extended periods, and it’s essential for them to be a good fit for your hands.

chrome thinning shears


Mastering the Art of Texturizing with Thinning Shears

Now that we’ve covered the basics, it’s time to dive into the process of mastering the art of texturizing with thinning shears. To get the best results, it’s crucial to understand your client’s hair type, texture, and desired outcome and choose the appropriate thinning shears accordingly. Remember, practice makes perfect, so don’t be afraid to experiment and hone your skills over time.

Why texturizing is essential

Every hairstylist knows that a great haircut is about more than just the length. It also has everything to do with texture. Texturizing is essential to create movement, dimension, and to remove excess weight from the hair. When done correctly, it will help your clients achieve the desired look they are seeking and give their hair a more natural, blended appearance. However, mastering this technique can be a challenge, especially for those who may just be starting out in the industry. Enter the wonderful world of thinning shears – versatile tools that make texturizing a breeze!

Techniques for using thinning shears

As with any hairstyling tool, mastering the art of texturizing with thinning shears involves learning proper techniques. One common method is point cutting, where you hold the shears at a 45-degree angle to the hair, and make small cuts as you move down the hair strand. This creates a soft, natural texture and is great for blending layers. Another technique to consider is slide cutting. Here, you’ll glide the shears down the hair while slightly closing the blades, creating a more dramatic, layered effect. Keep in mind that practice makes perfect, and don’t be afraid to experiment on a mannequin head before moving to real clients.


The Do’s and Don’ts of Thinning Shears

To wrap up our deep dive into the world of precision cutting and texturizing with thinning shears, here’s a list of do’s and don’ts to keep in mind as you practice your newfound skills:

Do’s
1. Do choose the right thinning shears for the job
2. Do practice before using thinning shears on clients
3. Do use proper sectioning techniques
4. Do take your time and work systematically

Don’ts
1. Don’t use thinning shears too close to the scalp
2. Don’t use thinning shears on wet hair
3. Don’t over-thin the hair, as it may result in a choppy appearance
4. Don’t forget to clean and maintain your shears for optimal performance