
October 19, 2026/3 min read
Your End-of-Shift Routine for the Shears in the 5 Piece Hair Cutting Kit - 6CR
Learn how to wipe, oil, check, and store the shears from your 5 Piece Hair Cutting Kit - 6CR after a shift, with a clear point for when to stop adjusting and send them for service.
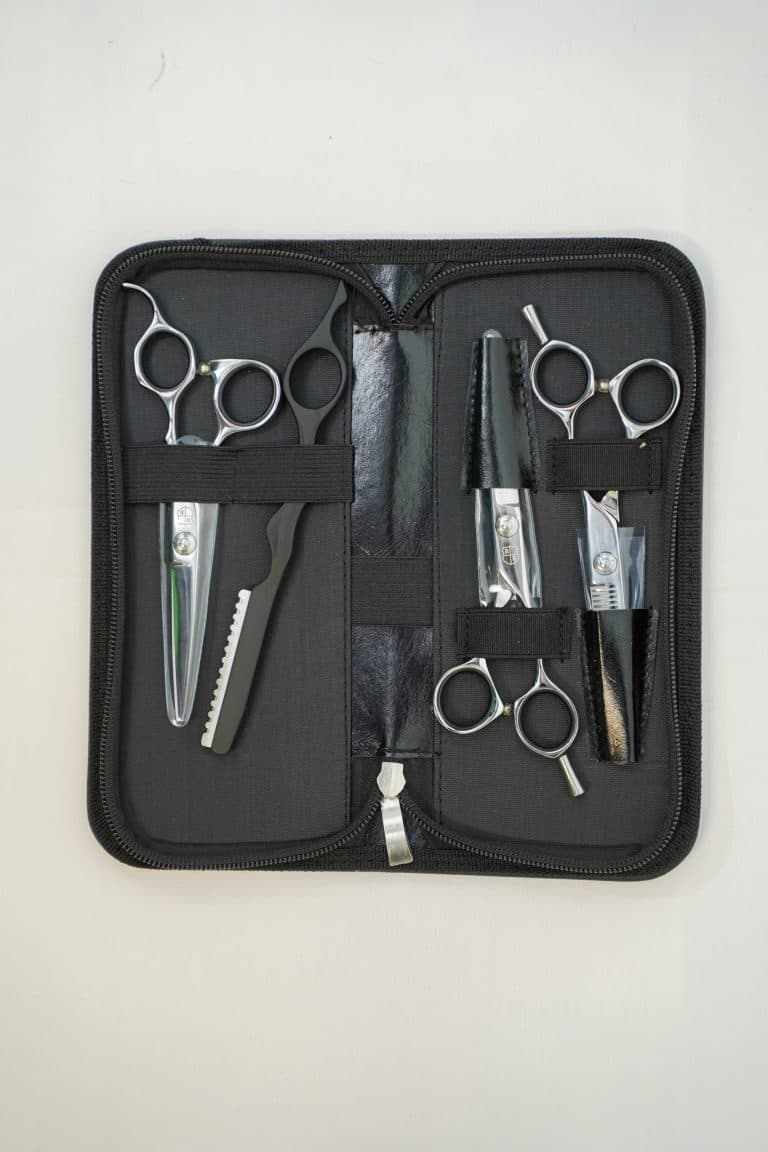
What is in your kit and what this routine covers
Your kit holds four cutting tools plus a shear wallet: a main cutting shear in the size and handle (left or right) you chose, a 5.5-inch cutting shear, a 32T thinning shear, and a hand/feather razor. Although it is sold as a five-piece kit, the routine below is about the shears. It does not cover the razor, so handle and clean that tool according to its own instructions.
Wipe and oil before you pack up
Over a working day, hair, styling product, moisture, and disinfectant residue can collect around the blades and the pivot. Wiping each shear down after use protects the finish and helps the blades move smoothly, so make it the first thing you do when the last client leaves.
- Wipe the shear down once you finish cutting for the shift.
- Place a small amount of oil at the pivot.
- Open and close the shear a few times so the oil works through the pivot.
Shears you use every day benefit from regular pivot oiling, and that is especially true after you have cleaned or disinfected them.
Check tension when your shear gives you a reason
Your shears may be asking for a tension check if your cuts turn inconsistent, the blade pulls or grabs hair near the tip, or your hand has to work harder than usual to close the blade. A tension check is not limited to those moments, but they are good prompts to stop and look.
- Clear loose hair and product from the pivot, then add a small amount of shear oil. Oil at the pivot makes the check more accurate, so do this before you judge the feel.
- Open the shear, raise one handle, and let the blade close on its own. It should not slam shut, and it should not hang wide open.
- If it needs a change, make a small adjustment and retest. Adjust gradually rather than tightening until it cuts.
- Before returning to client work, test the shear on clean hair or a test fiber.
Keep in mind what each direction can do. A screw that is too loose can make hair fold or push. One that is too tight can leave the shear feeling heavy, rough, or tiring, or even dull, though the edge itself may still be usable. If the screw, the ride line, or the blade feels damaged, stop adjusting. If tension changes do not stop the folding, pushing, pulling, or rough cutting, send your shears for service.
Store the shears so the blades stay protected
Put your shears in the wallet that comes with the kit, or in another case or protected holder, so the blades and tips do not touch other tools. Avoid tossing them loose into a drawer or bag. A small nick from a drawer, a counter, or a drop can change how a shear cuts.
Also keep your hair shears for hair only. Paper, tags, thread, and packaging are not what they are meant to cut, and fabric can dull or damage the edge as well.
Your closing sequence at a glance
At the end of a shift, wipe the shears, oil the pivot and work it through, check tension if your cutting gave you a reason to, and put the shears away in the wallet or another protective holder. The kit's razor and the teeth of the thinning shear fall outside this routine. When you want to see the kit itself, you can view the 5 Piece Hair Cutting Kit - 6CR on its product page.
Related resources
Sources
- 5 Piece Hair Cutting Kit - 6CR - Blacksmith Blades
- Adjusting Shear Tension - Blacksmith Blades
- Daily Shear Care and Storage - Blacksmith Blades